Several times now we've made paper plate sun catchers from nature as inspired by these nature collage paper plate sun catchers from Hands On: As We Grow.
An old linoleum floor, a passion for projects, a small family with big heart, and endless opportunities for creating a mess.
Showing posts with label creating gifts. Show all posts
Thursday, June 11, 2015
Dandelion Sun Catcher
A few weeks ago we shared our Dandelion Soup play invitation, which was a great way to use some of the dandelions in our yard. Of course, after the dandelions turned to seed, we couldn't use them in quite the same way. Instead, we created a couple of these Dandelion Sun Catchers.
Thursday, June 12, 2014
Teacher Thank You Tree Bookmarks (Free Printable)
This week marks Big Brother's last week of preschool before summer vacation. (He'll be headed back to the same program in the fall.) We wanted to find a way to say thank you to the teachers he has had this year. Preschool has been one of his favorite places ever, and it is his teachers who really make the place special for all of the kids. When we were brainstorming things we can make for people he started talking a lot about bookmarks, and it inspired me to help him create bookmarks for the teachers.
I had spotted many cute ideas on Pinterest for either plant or tree themed gifts, including several cute fingerprint tree ideas.
Wednesday, May 21, 2014
A Treasure Box for Daddy
We made this box last year for Daddy for Father's Day. We couldn't share it then as we wanted to keep it a surprise. But with Father's Day 2014 right around the corner it seemed like a great time to share.
Around this time last year I noticed that many little trinkets were piling up on my husband's dresser. The pile especially included little surprises created by Big Brother, as well as a few other special items.
I spotted an unfinished photo box at Michael's and knew we could turn that into a wonderful Father's Day Gift.
Monday, May 12, 2014
Sugar & Spice Teacher Gifts
Teacher appreciation week officially was last week, but I wanted to share what we put together for Big Brother's preschool teachers.
They were easy and cute to create.
Wednesday, May 7, 2014
Hand Painted Reusable Shopping Bags (Mother's Day Gifts)
We are very blessed to have many different mothers we celebrate on Mother's Day. We have several great grandmothers to honor and three grandmothers. Last year for the grandmother's we enjoyed making our Mother's Day Flower Pots. This year we wanted to make another hand painted project and decided to create reusable shopping bags.
A few years ago we had made butterfly prints with our hands and decided to base our bag theme on the same butterflies. We added in some grass, flowers, and a sun to create a more colorful bag.
Sunday, March 9, 2014
Squeeze Paint Pots
We made a couple of these last summer and had a lot of fun with them but never posted about it. This week we wanted to create a housewarming present for some good friends, and decided this would be a fun hands on craft for Big Brother to create for them.
What's neat about them is you never know exactly how they are going to turn out.
Monday, January 20, 2014
Double Chocolate Valentine's Popcorn
Yesterday (January 19) was National Popcorn Day, which inspired Big Brother and I to experiment with a new popcorn recipe ourselves. In order to get ready for Valentine's Day, we decided to try out a new recipe we might want to give some of our own sweet valentines.
We've made white chocolate popcorn before, but decided this time to add in a semi-sweet chocolate element too.
Sunday, December 29, 2013
Peppermint Marshmallow Stir Sticks
I've had so much fun making these a couple of times over the past holiday week I just had to share how easy they are to make.
Tuesday, December 17, 2013
Stamped Salt Dough Ornaments
It's amazing to me, but there are only 8 days left until Christmas and we still have lots of projects on our list to complete. But, it really is possible to create quick, handmade projects and treats even with just over a week to go. Our hope is to share some of our ideas with you in the next few days. (And I say hope, because on top of the busy season we seem to be in spell where unexpected events keep taking us away from our projects and posting. But we'll give it our best attempt.)
Last week we worked on these stamped salt dough ornaments. There are lots of different salt dough ornament ideas floating around on Pinterest these days, which inspired us to create up our own idea.
The second set were more traditional stamps. For the most part we were doing snowflakes, but we couldn't resist trying the poinsettia too.
Last week we worked on these stamped salt dough ornaments. There are lots of different salt dough ornament ideas floating around on Pinterest these days, which inspired us to create up our own idea.
To begin with we used a basic salt dough recipe:
1 cup flour
1/2 cup salt
1/2 cup cold water
First I mixed the flour and salt together in a bowl, then added the water and stirred with a wooden spoon. Once it had formed into a ball I placed it onto the counter and kneaded it until is was fully blended and not lumpy. (It still feels kind of grainy to the touch.)
We used two kinds of stamps and presses. The first I made using small wooden snowflake cutouts which I hot glued to corks. I thought this would give some height off the dough so we only got the image and not marks from the sides.
In order to make our ornaments, I rolled the dough flat until it was about 1/4 inch thick. Big Brother then used one of our round biscuit cutters to cut out circles.
Next he pressed or stamped images into each circle. He liked experimenting with mixing different sizes on each ornament.
When he was done cutting and pressing, we baked the ornaments on a cookie sheet in a 250 degree (Fahrenheit) oven for about 2 hours. When they were done we had these creamy white snowflake ornaments.
The next day we decided to paint some of the baked ornaments. We used acrylic craft paints, including glitter acrylic paints which come from a Martha Stewart line sold at JoAnn Fabric Stores.
In the end we liked the glitter paints best as they were not too dense in color because they had more of a clear base. We also decided not to paint all of them, as we liked many of the ornaments plain.
We like giving each grandparent a handmade ornament every year, and we're considering using these this year. They also make nice add-ons to wrapped gifts. But, we still have some more fun, handmade projects to try out this week.
This post may also have been shared at some of these terrific link parties.
Wednesday, July 31, 2013
Blueberry Cork Prints
We're loving that blueberry season has arrived!
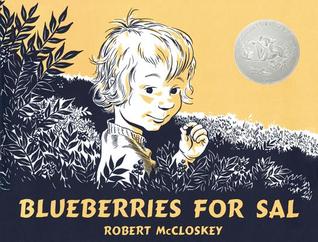
We read Blueberries for Sal before heading to pick berries the first week and I loved Big Brother's connections to the story while we were there. He told me he was just like "Little Sal" because he was eating so many. He also really wanted to bring some home to "can for winter" and was a little disappointed when I informed him that we usually just freeze them. We read Jamberry at the berry patch the second week while munching on berries.
With all the blueberry food fun, Big Brother and I thought it would be fun to do a blueberry themed project. I remembered seeing a project several years ago in a Martha Stewart Living magazine using corks to create blueberries and we decided to try it out. I cut small crosses into two corks and cut a small leaf shape into a third cork.
We used craft acrylic paint and white muslin. I taped the muslin to cardboard before we started printing. Both Big Brother and I worked on our own pieces.
I found the printing went better if I blotted it first onto a paper towel. After we printed the berries we added leaves.
Although it took some experimenting on my piece to get the images as I had envisioned, I really liked how it turned out.
Big Brother was pleased with his work too.
As the muslin was just scraps of fabric I don't have a plan as of yet about what we'll turn our printed fabric into. I think that this would be a really pretty design to create on canvas bags, fabric napkins, tea towels, or gift cards. The corks made it kid friendly as well, so kiddos could use this same idea to create teacher or grandma gifts. I'm currently envisioning a possible table runner . . .
This post may also have been shared at some of these terrific link parties.
Sunday, June 16, 2013
A Father's Day Gift: Spicy BBQ Rub
My Dad loves to grill. In fact he continues to grill year round even when there is several feet of snow on the ground. So I was pretty excited when I saw these personalized grill utensils at Pick Your Plum a few weeks ago. (I'm new to Pick Your Plum, and I love seeing their daily deal arrive in my inbox each day. This was my first order and I was pleased with the ordering and delivery process.)
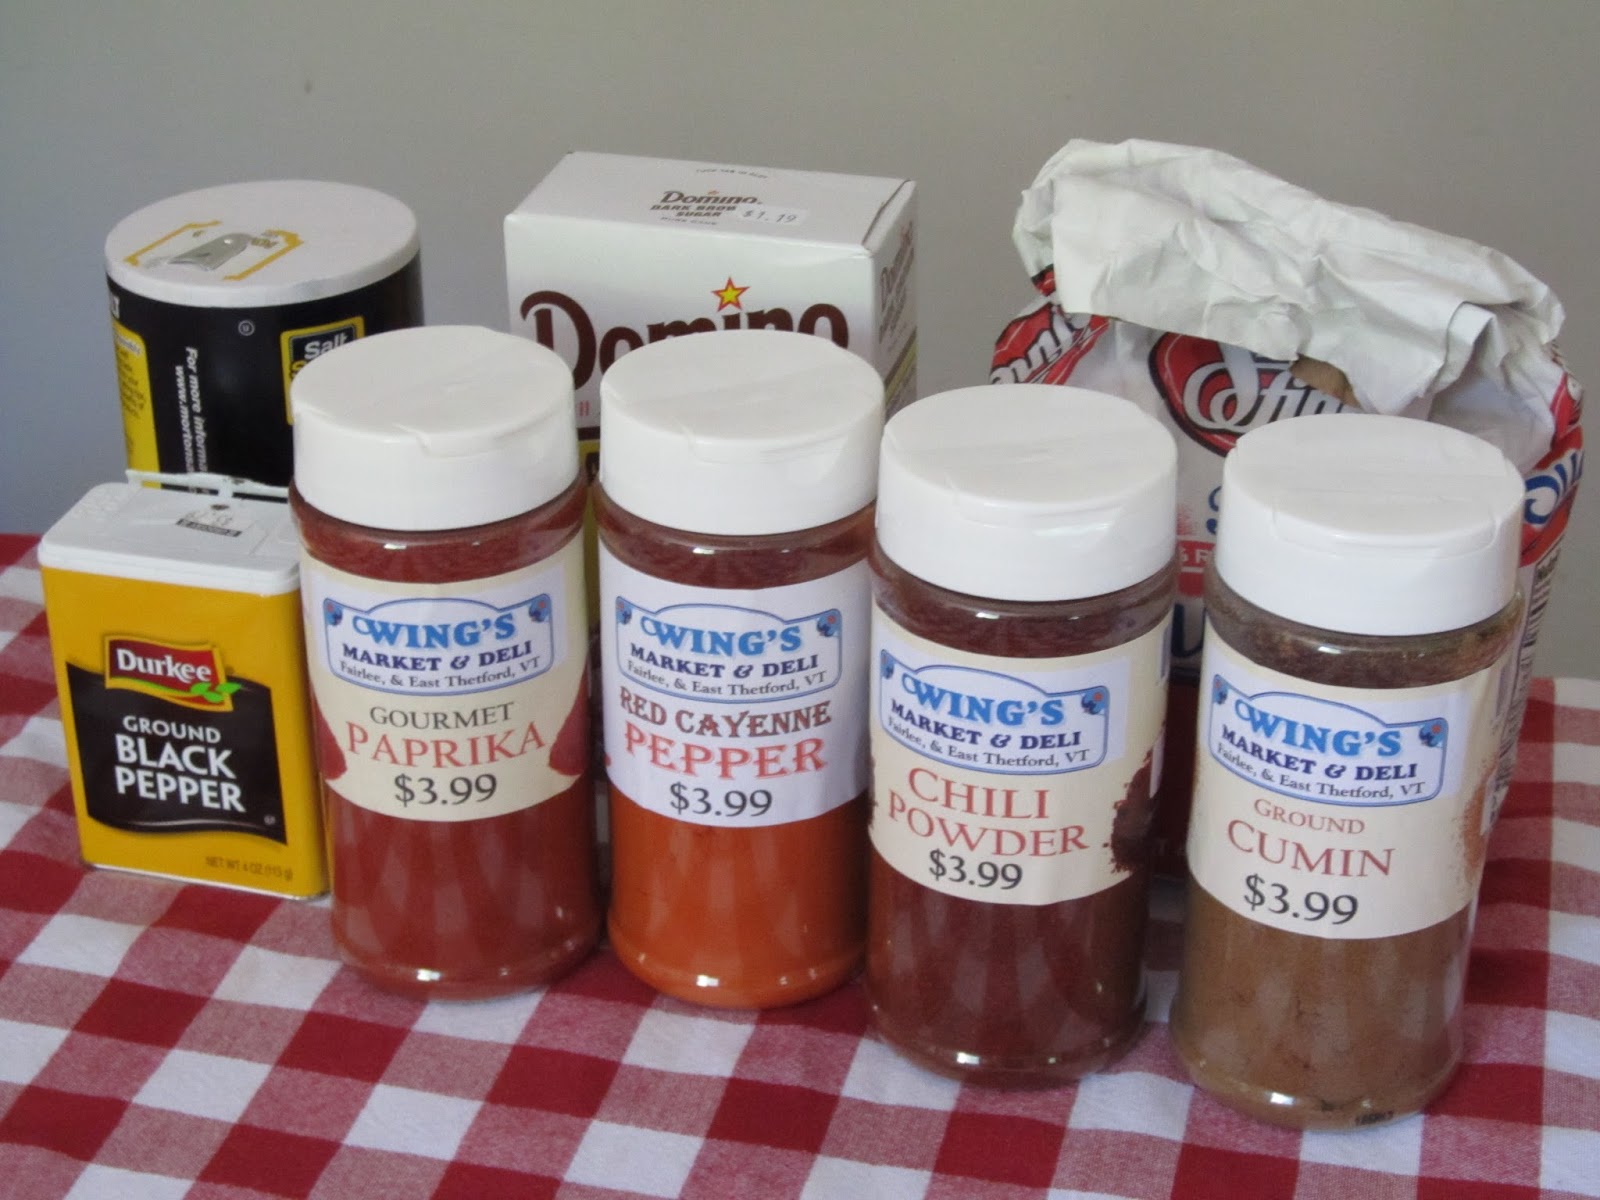
I knew I wanted something else to go with the utensils, so I decided we could create a BBQ rub. We gave BBQ rubs as part of our food baskets at Christmas. They are easy to create and keep, and there are lots of flavor options and ideas to play with. I combined several recipes I found on the internet to create our "Spicy BBQ Rub" recipe.
The Recipe:
(I actually used double these quantities and made a little too much, so I'm writing up smaller amounts here. Be prepared to package up around 3 pints with these amounts. Half pint containers make a nice gift size.)
1/2 cup white sugar
1 cup brown sugar
1/2 cup ground cumin
1/2 cup chili powder
1/4 cup ground black pepper
1/4 cup red cayenne pepper
1/2 cup dried minced onion
1/4 cup smoked paprika
3/4 cup paprika
Ingredient note: One of our local stores sells spices in these convenient, large containers. I would also recommend finding them at a bulk store like BJ's or Costco when making a large recipe like this. Using the small containers usually found at a grocery store would add up in cost.
Big Brother was able to help with this recipe. We measured the ingredients into a large mixing bowl.
Next we mixed the ingredients with a wire whisk. The rub smelled pretty spicy at this point, both our noses were tingling. We did test it out at dinner by using it on some pork we grilled. It didn't taste as spicy after it had been cooked.
We used a measuring scoop to put the rub into mason jars.
We had a couple of other people we wanted to present the gift to besides my Dad, so we packaged up several jars of the rub and saved some for ourselves.
I again created some labels using our word processing program and some free clip art.
We added a little ribbon . . .
. . . and we had the perfect complement to our utensils.
Monday, June 3, 2013
Peppermint Foot Soak
Over Memorial Day weekend two of my incredibly talented friends decided to utilize their fitness skills and run in a local marathon. One friend, after a long and dedicated training period, ran her first full marathon. She ran the course in under 5 hours! Another friend completed her fifth half-marathon, which means that she's run 65.5 miles in just marathon running! I'm incredibly impressed with both friends as I never see myself running more than my small, easy to prepare for, 5k runs.
In honor of their running, I wanted to create something they could pamper themselves with. I love the feel of peppermint lotion on tired feet and decided to experiment with a peppermint foot soak.

The Ingredients:
8 cups epsom salts
1 and 1/2 cups baking soda
1/2 cup loose peppermint tea
8-10 drops of peppermint oil
(The peppermint oil and loose tea can be found at a local health food or bulk store.)
For Gift Giving:
Glass containers
Ribbon
Labels (optional)
Directions:
1. Mix the epsom salts, baking soda, and loose peppermint tea into a large bowl. Stir with a wooden spoon.
2. Add in 8 to 10 drops of peppermint oil. (Please note, this is peppermint oil not peppermint extract.) The oil is strong so add the drops slowly until it reaches a scent level you're comfortable with. I used a small dropper we had on hand as my oil did not come with a dropper. Stir with a wooden spoon. If clumps form mush with the spoon or your hands.
4. I used our word processing program to create a cute gift label. I made this one fit a running theme. But this soak could work for a variety of people, so the label could reflect the group. For those of you still looking for an end of year teacher gift this would also be much appreciated, teachers spend a lot of time on their feet. If you're looking for clip art, there are lots of options on the internet. I always add "free" to my image search as then I find royalty free pieces. I printed these labels onto white card stock.
5. Hole punch the label and use ribbon to tie the card onto the container. A beautiful (and easy) gift for some tired feet!
In honor of their running, I wanted to create something they could pamper themselves with. I love the feel of peppermint lotion on tired feet and decided to experiment with a peppermint foot soak.
The Ingredients:
8 cups epsom salts
1 and 1/2 cups baking soda
1/2 cup loose peppermint tea
8-10 drops of peppermint oil
(The peppermint oil and loose tea can be found at a local health food or bulk store.)
For Gift Giving:
Glass containers
Ribbon
Labels (optional)
Directions:
1. Mix the epsom salts, baking soda, and loose peppermint tea into a large bowl. Stir with a wooden spoon.
3. If you're giving the soak as a gift it's nice to package it into glass containers for easy storage. It also looks pretty. I found these containers at a local hardware store. Mason jars would also work nicely. I had enough to fill the three containers, another glass container, and saved some in a ziplock bag to try on my own feet.
5. Hole punch the label and use ribbon to tie the card onto the container. A beautiful (and easy) gift for some tired feet!
Saturday, May 18, 2013
Fabric Fun Box
A sweet little friend of ours turned 1 this week. Last week during a play date I noticed how much she liked taking things in and out of containers. It reminded me of a link I had seen a while back on how to make a baby toy out of a wipe container and fabric scraps. I decided to make one for her birthday. I knew I had a great collection of fabric scraps from a project I'd done as a preschool teacher over 8 years ago. (I rarely throw anything out . . . just ask my husband.)
I wanted to personalize it for her so I decided to cover the box with white contact paper. I cut two strips each four inches wide.
I peeled off the paper and wrapped one strip around the front on the box and the sides. I chose to trim the paper while it was on the box, but it could be traced beforehand. I then cut the other strip in half and covered the back of the box.
I added some garden designs, and later added her name, with permanent marker.
Next I cut the scraps with the pinking shears. I cut each piece to be slightly larger than a DVD case. I used the pinking shears with the hope it would decrease fraying.
There were about 15 rectangles all together. The fabric rectangles folded into the box neatly.
The box was ready for playing. Now there can be lots of pulling out, putting back in, and lid opening. I can't wait to hear how she enjoys it!
Friday, May 17, 2013
Teacher Appreciation Sunflowers
These days Pinterest is filled with teacher appreciation gift ideas as both kids and adults are wrapping up the school year. As a teacher, I've always liked when I can see that kids have either had a part in picking or creating a gift. I try to do that for my son's teachers. We choose to celebrate his teachers on National Provider Appreciation Day, which usually is the Friday before Mother's Day.
This year because we were already painting pots for Mother's Day (see Mother's Day Flower Pots) I decided to have him also create a flower pot for his children's center. We started in a similar way to the Mother's Day pots.
This time he picked several colors to paint the top rim.
I wanted to play on the name of his center, Little Feet, so we painted just his feet to look like they were in the garden and added flowers on the bottom.
But instead of fresh flowers, there needed to be something in the pot for each individual teacher. I was inspired by tubes of chocolate covered sunflower seeds in the check out aisle of the craft store and knew we could turn those into a cute sunflower themed gift.
Materials included: chocolate coated sunflower seeds, yellow card stock, white glue, green pipe cleaners, green ribbon, plain sunflower seeds, and yellow cupcake liners. I used my scrapbook cutting system to create circles out of the darker yellow scrapbook paper,
but I often just trace an upside down glass or mug for circles.
First Big Brother cut slits in the cupcake liners.
He needed help with this as he's still learning the correct way to hold and use scissors. I had him sit in my lap so I could guide him with my hands and we pretended they were "alligators" opening and closing their mouths. This seemed to help him think about how the tools worked.
After cutting the slits in the liners, Big Brother glued the liners onto the card stock circles so that the yellow side was up. He then added on the sunflower seeds with more glue.
I created quick gift tags using the lighter yellow card stock and a very fine point sharpie marker. I had Big Brother tell me something he liked about each teacher and something he wanted to thank them for. We wrote this on the back of the cards.
After the glue had dried we taped a pipe cleaner to the back of the sunflower head and wrapped it around the tube. (We added a small "bubble" of tape to the back of the flower to keep the sunflower on the tube.) We tied the card on with the ribbon.
All of the "flowers" went into the pot with some floral rocks in the bottom to help the tubes stay upright.
| Big Brother ready to deliver the plant pot and flowers. |
Big Brother took a lot of pride in this project and couldn't wait to share it with his teachers. He has been at his center since he was 6 months old. Although he currently is only there two days a week, he loves the center and teachers and has always felt supported by them. It takes a lot of trust to leave your little ones somewhere and we greatly appreciate the care his teachers have always given him.
Subscribe to:
Posts (Atom)