UA-52744532-1

Monday, April 29, 2013

Creating a Big Brother Present

We tried the classic big sibling kissing Mama's belly,
but in the end this one was much more us.
 
This winter we spent a lot of time preparing Big Brother for the arrival of Little Brother. We took him to the midwife and ultrasound visits, read books, talked about how Little Brother compared to the other babies at daycare, and tried to involve Big Brother as much as possible in some of the planning.

Something For the Nursery
One of the things we did to include Big Brother in the process was we had him create a piece of art which would hang in Little Brother's room. We told him that it would be something nice for Little Brother to look at and make him feel welcome. Although he was incredibly excited for the arrival of his little brother, our big guy was feeling a little sad to see some of the changes happening in the house. This included the emptying of our guest room where beloved family and friends usually stayed in order to create a nursery. He liked the idea of being able to help out and have a voice in that room. 

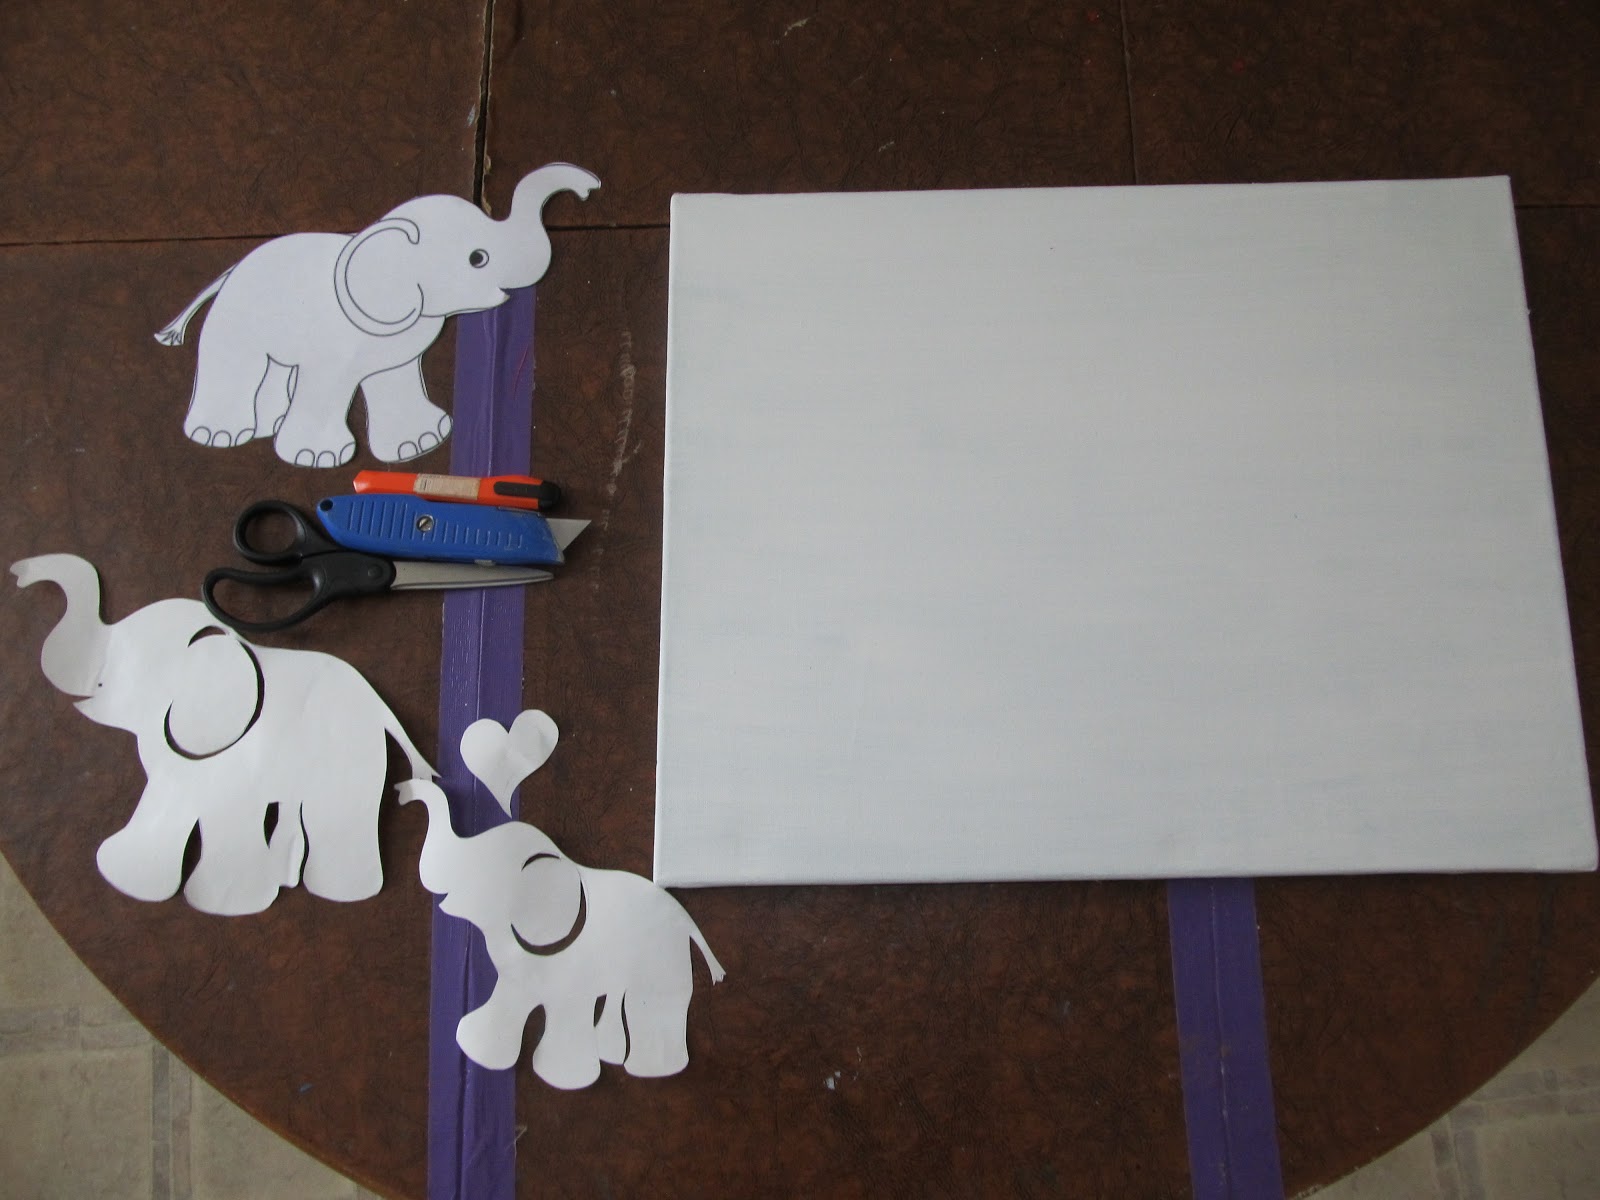
We had decided to have elephant details in the baby's room, so I looked up elephant clip art on the internet. When I found one image I liked I printed it out in two different sizes and traced it onto white contact paper. Using a small utility knife I cut the pieces out to essentially make two large stickers. I also free hand drew a small heart and cut that out.


I had an old canvas which I had painted on in college which I repainted with white gesso. After it dried I stuck my handmade "stickers" onto the canvas. (Kind of hard to see in the picture below.)


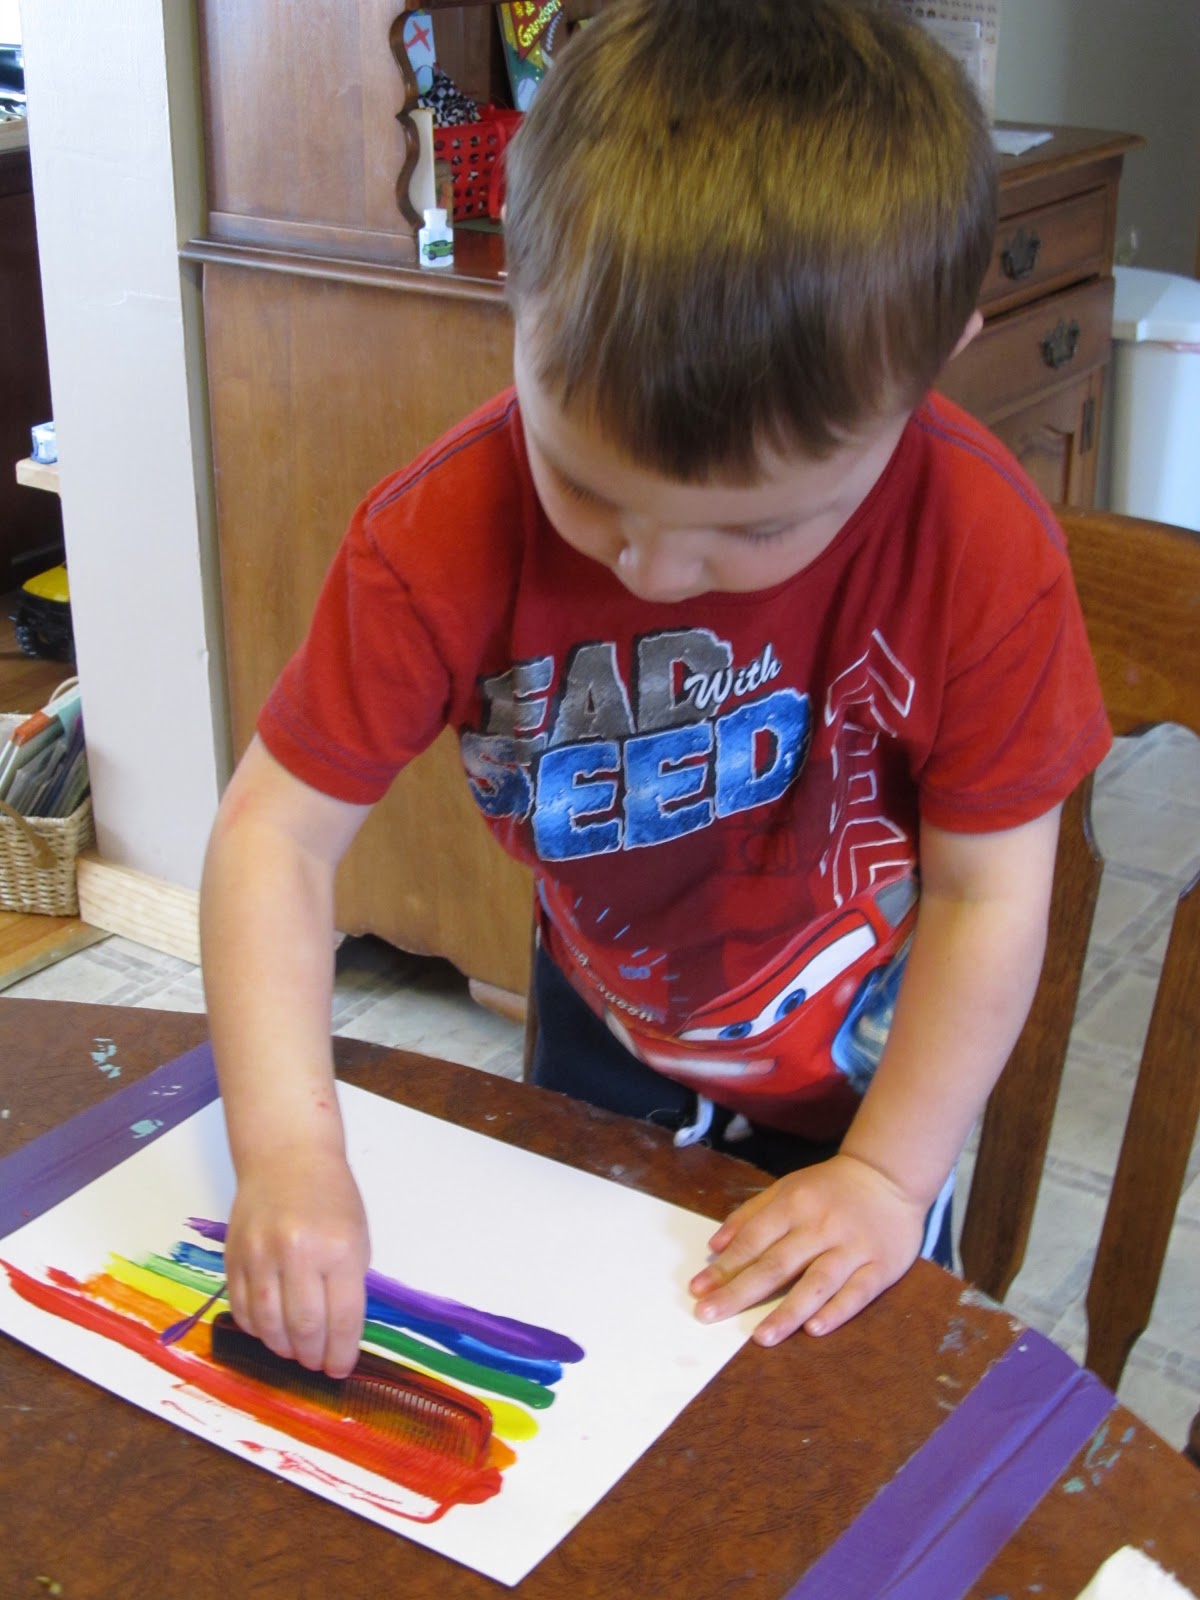
Now came time for Big Brother to be involved. Using craft acrylic paints he painted over the contact paper stickers and filled the whole canvas with color. He loved mixing the colors, and created some really nice shades as he worked. At the very end, we painted his hand and printed it on the opposite side, as a way of "signing" the work. (Side note: We keep a few clothes on hand which we wear when painting with more permanent materials like acrylic. That way no one has to worry if it gets on us.)


When the paint dried I peeled off the stickers and we were left with two white elephants (a big brother and a little brother elephant) in a field of blues, greens, and yellows.


Over the last month and a half many people visited to meet our new baby and several wanted to see the baby's room. Big Brother likes to show the room with pride and point out his contribution to his brother's space. 

Self Portraits of a 3 Year Old

Now that Big Brother is a little older he is able to start drawing things which are slightly more recognizable to other viewers. Although his drawings in the past year have often come with a story they were usually created as he told the story. And he tends to be a kid more interested in projects which involve painting and filling spaces with color versus creating line drawings. So several days before his third birthday I was pretty excited to discover he was able to draw faces with a little verbal coaching from me. After doing a few on his chalkboard one evening he then started drawing them more spontaneously on his own.


I realized it would be a great time to do a self-portrait project. Self portraits can be easily be done with kids of all ages once they get old enough to draw a little more concretely, they just get much more detailed the older they get. For younger kids, like my guy, it helps them further develop some self-awareness of themselves. Providing a mirror for kids while drawing themselves is not only fun for the young artist, but allows them to observe themselves and think about what they want to include in their drawing. We have a plexiglass mirror in our dress up stuff which I pulled out and propped up on the kitchen table.

By the time we did this project, he knew that faces were round or "circles" and started with that. As he worked I asked him some questions which he could answer by looking in the mirror. "What color are your eyes? What color is your hair? What else do you notice about yourself in the mirror?" He decided to include brown eyes, brown hair, a nose, ears, and two lips. He started with one line for the mouth, looked in the mirror and decided to add another line because he had two lips.


We were doing some discussion around his favorite foods in connection to a book we'd been reading, so we added a plate with his favorite foods written onto it.


On his actual third birthday I had him do another portrait. I'm planning on adding this to a birthday book (another post coming about the birthday book soon) and having him do a portrait each year.


Saturday, April 27, 2013

My first post: Process and Product

For anyone who knows me personally, they know that I love the cohesive look of a well completed, detail orientated project. But when working with kids, I know that it is often the process, not the product, that counts. I've been pretty good at keeping that in the forefront of my mind while working with first and second grade students the last eight years, but have sometimes found that harder when creating at home with my own kiddo. This especially seems to be true as he gets a little older and even more independent, thus developing his OWN ideas on how the project will go.

Although lately I've been letting our projects be more about the process there still come times where I want to turn these projects into a specific product. So I love when both process and product become part of the experience.

We recently had that combination when creating thank you cards for my big guy's birthday presents. I had been eyeing the rainbow comb painting images I had been seeing on Pinterest, and grabbed a big package of combs at the dollar store about a month ago. One dreary afternoon last week when it was still too chilly for Little Brother outside, and therefore we were all stuck in the house, we pulled out the paint and combs and gave it a try.


It was a huge hit with Big Brother. To start, I painted thick stripes of red, orange, yellow, green, blue, and purple paint onto white card stock. He then chose a comb from the set and began using it to draw lines through the paint. The package had a variety of comb tooth sizes which he quickly figured out. This allowed him to make different size "stripes" through the paint. As we made more he started doing the stripes himself. One of the reasons I had originally wanted to do this project was so we could begin to talk about the order of the colors of the rainbow and as we painted the stripes he began to call out the order.

In terms of process he loved dragging the comb through the paint and swirling it to mix the colors a little. We did way more than I originally expected and went on to experiment with some two color patterns as well.

But what about the product? Well, in the end I cut the images he had made into roughly 3" x 5" pieces. I then mounted the paintings onto blue scrapbook paper which I then glued to white card stock. This created the finished product of rainbow painted thank you cards. I always add the date, type of project, and the name of my little artist, so family members can know who it was by and how it was created. In the end, he loved the project and I was pleased with the final product, a perfect mix!