UA-52744532-1

Wednesday, July 31, 2013

Blueberry Cork Prints

We're loving that blueberry season has arrived!

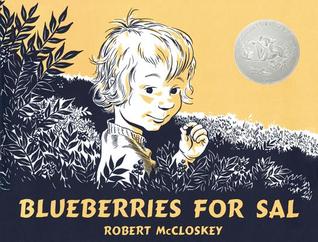
The last two weeks of our Summer CSA share have come with the opportunity to pick our own berries. So we've picked them, frozen them, baked them in muffins, cooked them in pancakes, topped them with vanilla frozen yogurt, added them to lemonade, and the adults even tested out a grown-ups only drink recipe. Of course, we've also eaten them by the handful and read about them. Two great blueberry themed books include Blueberries For Sal by Robert McCloskey and Jamberry by Bruce Degen.


We read Blueberries for Sal before heading to pick berries the first week and I loved Big Brother's connections to the story while we were there. He told me he was just like "Little Sal" because he was eating so many. He also really wanted to bring some home to "can for winter" and was a little disappointed when I informed him that we usually just freeze them. We read Jamberry at the berry patch the second week while munching on berries. 

With all the blueberry food fun, Big Brother and I thought it would be fun to do a blueberry themed project. I remembered seeing a project several years ago in a Martha Stewart Living magazine using corks to create blueberries and we decided to try it out. I cut small crosses into two corks and cut a small leaf shape into a third cork.

We used craft acrylic paint and white muslin. I taped the muslin to cardboard before we started printing. Both Big Brother and I worked on our own pieces. 

I found the printing went better if I blotted it first onto a paper towel. After we printed the berries we added leaves. 

Although it took some experimenting on my piece to get the images as I had envisioned, I really liked how it turned out. 

Big Brother was pleased with his work too. 

As the muslin was just scraps of fabric I don't have a plan as of yet about what we'll turn our printed fabric into. I think that this would be a really pretty design to create on canvas bags, fabric napkins, tea towels, or gift cards. The corks made it kid friendly as well, so kiddos could use this same idea to create teacher or grandma gifts. I'm currently envisioning a possible table runner . . .


Related Posts Plugin for WordPress, Blogger...
This post may also have been shared at some of these terrific link parties

Monday, July 29, 2013

Alphabet Adventures: G is for Golf

Big Brother is curious about all things sports related, and although my husband and I are not major sports fanatics, we're enjoying watching him explore a variety of different athletic endeavors. So when it came time for our "G Adventure" we knew mini-golf was a great summer activity. We had never taken him before but he's been really curious about golf as several family members play.

The Adventure
This weekend we headed a little south to a local mini-golf place. Even though we're not sports nuts, my husband and I both do enjoy a good game of mini-golf and have been known to get pretty competitive with one another in the past. We quickly realized that mini-golfing with a three year old was a whole different game.

Big Brother is probably a little more ready for the driving range with the swing he was using. But when not swinging he combined a mix of soccer, hockey, and pinball machine moves to make his way through the 18 holes. By the end he was getting a little closer to a swing that looked like a putt and a smaller number of hits. Little Brother eagerly watched from the sidelines. Mini-golf proved to be a lot of fun for all of us.


The Project
G is for Gold!


This was a quickie collage project which allowed Big Brother to create freely. He actually worked on it while I got Little Brother ready for bed. I put out gold glitter glue, gold glitter, and gold sequins. He pretty much went for the squeeze and dump. But, he sang as "G is for gold" the whole time he created it. 

And in a real family moment, I didn't gather a book ahead of time that fit with either part of the adventure. But I think in this adventure, it was really all about the doing!

Friday, July 26, 2013

Alphabet Adventures: F is for Fish Hatchery

We were excited to head out on this adventure. We knew we easily could have gone fishing for the letter "F" but we wanted to do something a little different. So we headed to a local fish hatchery instead. We brought our Big Niece along and she loved coming on the adventure. The clue bag contained the letter F and a toy fish. She was great at trying to guess where we were going and we were impressed with some of her connections. But we did need to do some extra prompting to help them figure out the trip.

The Adventure
The fish hatchery is run by a state Fish and Game Department. Different varieties of trout are raised at the hatchery and then released into the wild. The public is allowed to come visit the hatchery during the daytime hours and view the trout in their pools.

The trout at the front are especially large and incredibly fun to watch and feed. The kids were pretty impressed when we first got there. 

The hatchery has containers of approved fish food (as the trout are on a specific diet) and for 25¢ you can get a good handful. We got several handfuls and visited all the pools, seeing the trout in many different stages of their life cycle. Unfortunately my lens couldn't really capture how incredible the fish were in the pools and ponds or how it looked when we fed them.

We also visited their Visitor's Center which contained information about and specimens of other local animals. This prompted finding some more "F" words including fox, fisher cat, and fur. 

We ended our adventure with a picnic lunch at one of their picnic tables and one more stop at the front pools to feed the biggest fish. 

When we got home we read a great fish story, Jangles: A Big Fish Story by David Shannon. It tells the tale of a mythical trout and tied in perfectly to the large trout we'd seen earlier in the day. 

The Project
When we got home we continued our "F" day by completing our project: F is for ferns. Our backyard is surrounded by ferns. We collected a couple of ferns and used crayons and tracing paper to make fern rubbings. 

We did several, the end results were really pretty! We're planning on hanging the extras in a window. 

Another great part of this adventure was that except for the handful of quarters we spent on fish food, it was FREE. 

A few other F adventure ideas: farm, forest, field, football game, and flower garden. 

Tuesday, July 23, 2013

Cardboard Post Office

So I'm pretty certain my Mom made me something like this when I was a kid as I have fragments of memories of playing Post Office in a large, cardboard box. I've always loved box play, even as I grew into an adult, and I've loved some of the ways Big Brother and I have used them so far. But with my fond memories in mind I couldn't wait to create a Post Office for him.


Our timing was perfect this week as Big Brother's been interested in the mail and regularly checking our mail box. And while we were cleaning our basement he found this unusual cookie tin and incorporated it into his daily play.

We also have our Big Niece visiting three days this week. At age 6 I knew she would be able to add another level of pretend play to the Post Office theme and make the experience more fun for both of them. 

We've been holding onto the box since December when we got a new oven, so it was already a little used and colored on. But I cut a new special window and slits for mail. I used colorful duck tape to create the signs and added in a few props. This included a small table, blank envelopes, markers & pencils, scissors, white paper, mailing labels, stickers, stamps & ink pad, and tape. I also put in a few containers and bags. 

The kids were pretty excited when they discovered the set up and played in the Post Office for big chunks of the day. They made mail, bought mail, gave mail, delivered mail, stamped mail, and sorted mail. 

They extended the play to involve more areas of the house and varied the scenarios for who, how, and why they were delivering mail. 

When they had to come eat lunch they "closed" the Post Office for a while. Check out my niece's great inventive spelling! 
The sign is meant to say, "Staff Only. No People. Out of Order." 
One great thing about box play is the theme can change with the inspiration of the child. My niece's plan for tomorrow is to bring her pretend cash register from home and turn it into a grocery store. The other great thing about box play, is that the play continues until the box is well loved and ready to go to recycling. I have a feeling ours will be well loved this week. 

Monday, July 22, 2013

Alphabet Adventures: E is for Eclairs at Elizabeth's Park

Okay, as we already admitted on Facebook, determining an Alphabet Adventure for the letter "E" stumped us a little. Luckily nearby we have a great, free park and playground called "Elizabeth's Park." We don't make it there on a regular basis, so it's always a treat when we do go. And we decided to add in a sweet treat too, eclairs!


The Adventure
This one was an easy one, we didn't need to pack too much. We loaded the cooler with a few healthy snacks and stopped quickly at the local grocery store for eclairs. The clue bag had the letter E and a picture of the wooden playground.

Once there, everyone had a chance to play.

We played long enough that our eclair snack turned into an early lunch, but luckily we'd packed more than just the sweet treat and had a small picnic. Big Brother, who'd never had these treats before, couldn't wait to try them!


Of course, after eating we played some more too!

The Project
Our E project used a new art material for us, crushed egg shells because E is for egg. 

A few days ago when baking I pre-washed the eggs with dish soap before adding them to the batter. After breaking them I washed the inside as well and let them dry on the windowsill. When we got ready to do our project I gathered the egg shells, a glue stick, and white paper. I drew an egg shape onto the white paper with pencil. 
We've been getting fresh eggs from my husband's coworker which come in several colors naturally. 

Big Brother first smashed the egg shells into pieces and then broke the pieces into even smaller parts. 

He then used the glue stick to fill in the egg shape and added the shell bits on top of the glue. 

After it dried I cut out the shape and mounted it onto colored card stock, which I added to the "e" page of our alphabet book.

We ended our E activities by reading The Beautiful Egg by James and Ruth McCrea. The tale tells of a hen who is teased by a robin and wren for having plain eggs, only to discover that her eggs are the ones being used to create beautiful painted eggs. 

A few other E adventure ideas: egg hunt (either one like those at Easter or perhaps one with real hens), something done in the evening, or something done early. 


Saturday, July 20, 2013

Triple Raisin Chewy Granola Bars

Big Brother is a fan of granola bars and I'm often on the look out for a good, homemade granola bar recipe. Today we decided to experiment. The primary inspiration came from a recipe my husband spotted on the back of a store brand cereal box. It used yogurt covered raisins but the coating was melted off and used as part of the mixture to hold the bar together. We replaced the cereal with oats and puffed rice and added in more raisins. I swapped out the nuts the original recipe called for and replaced them with sunflower seeds as I wanted these bars to be nut free. Of course, we also had to add a little bit of chocolate.

The recipe does involve some cooking, but no baking (so no oven on these hot days.) And it was a great one to get Big Brother's help with.

In the end, we were pretty pleased with the taste of this new treat! Definitely a sweeter granola bar, more like a dessert, that would make a great treat in a lunch box. (And sadly, we all know summer vacation won't last too much longer.)


The Recipe
Ingredients
2 cups quick cooking oats
1 cup puffed rice cereal
1/2 cup golden yellow raisins
1/2 cup craisins
1/2 cup sunflower seeds
1 cup yogurt covered raisins
1 stick (8 tablespoons) unsalted butter
3 tablespoons honey
1/2 cup miniature chocolate chips

Directions
1. Mix the oats, rice cereal, yellow raisins, craisins, and sunflower seeds in a large bowl.
Big Brother helped pour the ingredients into the bowl and then mix them.  Here he's sampling some of the dry ingredients while stirring. 
2. Melt the yogurt raisins, honey, and butter in a small sauce pan over medium to low heat. Melt until the coating has come off the raisins and the butter is fully melted. Stir regularly while melting. (An adult should do this task.)

3. When the yogurt and butter mixture is fully melted add to the dry ingredients (raisins too!) and stir until all the ingredients are dampened.

4. Spoon the mixture into a parchment lined 9x13 pan. Use a spoon or spatula to really press the mixture into the pan, so that the ingredients all stick together. At this point it's still a little warm from the mixture that was melted on the stove so I recommend not trying to press it in with your hand. Sprinkle the chocolate chips on top and gently press again.

5. Let cool for at least 30 minutes. I popped our batch in the fridge as it was pretty warm here today. 
6. Cut and either serve the bars or save them in a sealed container to use throughout the week. 

Really, any kind of dried fruit or nut could replace one of the raisin ingredients. It will be exciting to see what other flavors we can come up with. 

Thursday, July 18, 2013

"Mouse Paint" Color Wheel

Earlier this year we discovered fun, color changing bath tablets. These fizzy tablets come in blue, yellow, and red and are great for breaking up bath time boredom. We find them at a local pharmacy at a great price. We've loved exploring what colors we can create when we drop two tablets into the bathtub.

The other day inspired by our bath time color fun, we read Mouse Paint by Ellen Stoll Walsh. We also had my Little Niece visiting (who's the same age as Big Brother) and both three year olds loved the book. Three white mice dip themselves into three different paints and then dance in different colored puddles. In the end they wind up with even more colors than the three they started with! It's a great way to help teach kids about color mixing.

Tuesday, July 16, 2013

Alphabet Adventures: D is for Diner

Mmm, we went on a yummy Alphabet Adventure earlier this week, D is for Diner! On a beautiful summer morning we headed out a for a late breakfast at a local diner.

The Adventure
The clue bag was a little tricky for this adventure, but this time I filled the bag with some of our pretend play breakfast food. We then talked about where you can find these yummy foods and talked about what a diner is. We have several options of diners in our area, but choose to head a few towns over to the Fairlee Diner. We liked that inside there were options of either sitting at a booth or on old stools at the counter. It feels like an "authentic" diner.


After we ordered we created a fun alphabet activity while waiting. We used the diner's crayons and the disposable placemat to find as many "Ds" as we could. Each time Big Brother found a D he either circled it or crossed it off.

He needed some help with the lowercase letters and smaller print. This was a great way to embed letter recognition into something we were doing in a fun way. We'll definitely do this again with other letters. 

Of course, Little Brother also found a developmentally appropriate way to play with his placemat too. 

Breakfast was great, and everyone loved having a chance to order something different than our usual breakfast fare off the menu. 
Mmm, the waffles looked too yummy to even wait to take a picture for. 


The Project
Unfortunately we were not able to find a book which connected to a diner for this adventure, so we connected the book to the project instead. D is for Dog! 
We reread one of our favorite books, Go, Dog. Go! by P.D. Eastman. 

And then involved another family member in the project, our pet dog. We painted her foot and printed it onto paper. (We've done this before for a different project, but had two adults on hand so the prints came out better.) Our family dog is easy going and tolerates this, but I wouldn't recommend doing it with kids unless you know you have a dog who will be okay with her paw being painted. 

We're excited to be moving further into the alphabet! 

Other possible "D" adventures: donut shop, dug out, driving range, drive in movie theatre, dog park, or a dance. 


Monday, July 15, 2013

Bon Voyage Party

Each year my college friends and I find an opportunity to gather as a larger group for at least one long weekend. Although technology and social media allow us to keep tabs on one another from a distance, it's still not the same as the chance to get together in person. Sometimes the gatherings take a lot of preplanning and emails, as we travel from 5 different states and 7 different daily lives, but it's always worth it in the end. When I tell people about our gatherings, I usually add that we haven't been out of college that long so it's still manageable. That was until I recently realized we're quickly approaching our ten year reunion . . . which has given me a new sense of pride in our efforts to stay connected as a group and a greater sense of appreciation for these continuing friendships. 
No group gathering is complete without at least one attempt of a group shot. 
As we gathered over the Fourth of July weekend we not only looked forward to seeing one another, but also to celebrating the courageous and exciting life change of one of our friends. She has decided to move from her home and job in the United States to a position and home overseas in England. We wanted to celebrate her moving with a small, backyard "Bon Voyage" party and decided to go with a garden tea party with map and airplane themed decorations.

I made most of the decorations at home, and needed them to be easily transportable in the already overly packed car, so most of them were made out of paper. I used everyday materials I could find at home or the craft store. 

I used maps from the local "Welcome Center" to create a flag garland and used brown package paper with white poster paint to make a banner. Although I wanted to locate a true globe to display, instead I wound up using an inflatable one as I knew it would pack more easily. 

I'd been saving the four paper lanterns from the dollar store for a while, and they went perfectly with the colors of the maps. I used some cloud printer paper to create a garland of about thirty paper airplanes. The planes were folded in the traditional "old school" way and then threaded onto fishing line with a large needle. 

I made a few extra airplanes and attached some on craft wire to create an airplane arrangement. We also tucked some of the extra airplanes around the table. We used large white doilies on the table and trays to add to the theme of a garden tea party. 

Food included tea sandwiches, lemon cupcakes, chocolates, candies, fresh fruit, iced tea, and champagne.

 We discovered pretty much anything goes these days for tea sandwiches, so we had four options:

1) Cucumbers and alouette cheese on whole wheat cocktail bread. 
2) Honey ham, brie cheese, honey mustard, and green apple on baguette. 
3) Fresh mozzarella, tomato, basil leaves and olive oil on roasted garlic bread. 
4) Goat cheese, pecans, and fig jam on cinnamon raisin bread. 


We loved the breezy backyard of one friend's cottage for the setting and the tent another friend brought gave us a place to hang all the decorations. Even the colorful wooden chairs added to the ambiance. In all a really nice celebration and kick off to the weekend. 
The guest of honor. Bon Voyage my dear!

Additional note: This theme and decorations could also be used and added to in order to create a great boy's birthday party. I'm already thinking . . .


Related Posts Plugin for WordPress, Blogger...