UA-52744532-1

Sunday, June 16, 2013

A Father's Day Gift: Spicy BBQ Rub

My Dad loves to grill. In fact he continues to grill year round even when there is several feet of snow on the ground. So I was pretty excited when I saw these personalized grill utensils at Pick Your Plum a few weeks ago. (I'm new to Pick Your Plum, and I love seeing their daily deal arrive in my inbox each day. This was my first order and I was pleased with the ordering and delivery process.)

I knew I wanted something else to go with the utensils, so I decided we could create a BBQ rub. We gave BBQ rubs as part of our food baskets at Christmas. They are easy to create and keep, and there are lots of flavor options and ideas to play with. I combined several recipes I found on the internet to create our "Spicy BBQ Rub" recipe. 

The Recipe:
(I actually used double these quantities and made a little too much, so I'm writing up smaller amounts here. Be prepared to package up around 3 pints with these amounts. Half pint containers make a nice gift size.)
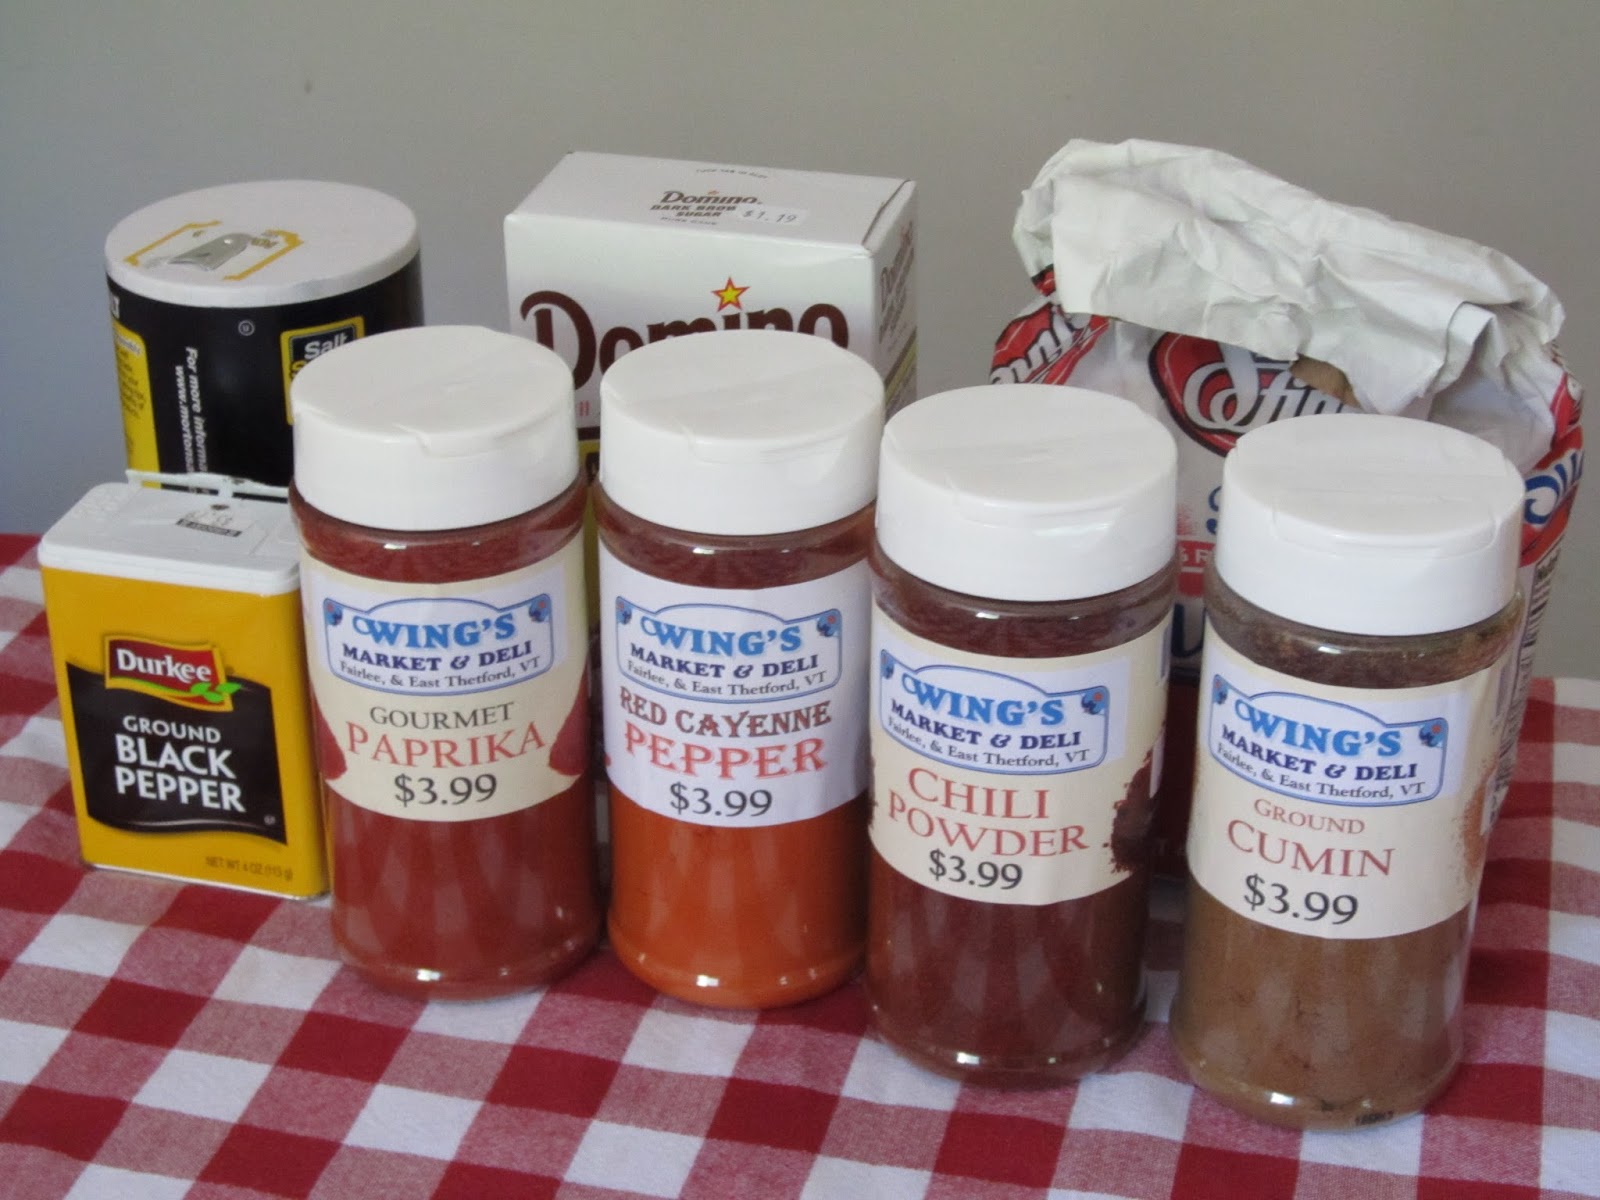
1/2 cup salt
1/2 cup white sugar
1 cup brown sugar
1/2 cup ground cumin
1/2 cup chili powder
1/4 cup ground black pepper
1/4 cup red cayenne pepper
1/2 cup dried minced onion
1/4 cup smoked paprika
3/4 cup paprika


Ingredient note: One of our local stores sells spices in these convenient, large containers. I would also recommend finding them at a bulk store like BJ's or Costco when making a large recipe like this. Using the small containers usually found at a grocery store would add up in cost.

Big Brother was able to help with this recipe. We measured the ingredients into a large mixing bowl. 


Next we mixed the ingredients with a wire whisk. The rub smelled pretty spicy at this point, both our noses were tingling. We did test it out at dinner by using it on some pork we grilled. It didn't taste as spicy after it had been cooked. 

We used a measuring scoop to put the rub into mason jars.

  We had a couple of other people we wanted to present the gift to besides my Dad, so we packaged up several jars of the rub and saved some for ourselves. 

I again created some labels using our word processing program and some free clip art. 

We added a little ribbon . . .

 . . . and we had the perfect complement to our utensils. 


Tuesday, June 11, 2013

Busy Boxes (Part 1)

The past few months many people have asked us how our transition from a family of three to a family of four has been. Of course the real answer is that we're still transitioning. In fact, I think we'll always be in a state of readjusting as both boys enter new stages and other family changes occur. It's just one of the many balancing acts of parenthood, how to stay consistent while also remaining flexible.

But, beyond that there are several things we did both ahead of and during the midst of the transition that have made some parts easier. One of these things was creating "busy boxes." During my pregnancy I noticed the term busy boxes on Pinterest and blogs. Busy boxes (also sometimes called "busy bags") are small boxes of activities, materials, projects, and kits which are meant to engage kids independently (and usually quietly.) They can be made from a variety of materials and individualized to fit a child's interests and developmental level.

I decided to create some for Big Brother to use when Little Brother arrived. I envisioned we would use them during nursing times. But I have found they are great for lots of different times: when we're inside for quiet nap times, when Little Brother needs my focused attention for bathing or going down for a rest, while I'm making dinner, sick days, and rainy days. Due to my maternity leave and the arrival of Little Brother in general we're spending more time home than we used to, so these can help break up the day. I keep them in a closet Big Brother does not use so he doesn't have steady access to them like other toys. They go back to the closet when the time period we need them for is over and we don't use them every day. Therefore they stay special.

Below are photographs of some I created for Big Brother and for a young relative who was also expecting a new sibling. Some great places for finding materials include the dollar store, craft stores, your junk drawer, and yard sales. When you're creating, think about your own kiddo. What tends to hold their interest? (Art, trucks, science, etc.) Developmentally what are they doing? (For example, if they still put a lot of things in their mouths than several of the ones below would not be recommended.) Is there a new skill or subject area they're interested in? (Bugs, counting, etc.) I find they work really well in small, plastic boxes with latch lids.

I'm calling this "Part 1" because I have several other ideas of busy boxes I'd like to create and as these lose their novelty I plan to introduce the new ideas.


 Busy Box Ideas
Beading Box: Large wooden beads and pipe cleaners. (Can also be used for color matching.)

Number Box: Large flat marbles, index cards with circles 1-6, and number counting cards for matching, counting, or other kid directed ideas. 

Funny fingers: Small ink pads, paper, and finger tips from office supply store (with raised dots for gripping.) 

Pattern box: Two sets within one box. Set A) Laminated pattern cards with small colored dots. More stickers or pompoms for recreating patterns. Set B) Laminated pattern strips with small foam blocks for recreating patterns.

Dino World: Floral rocks, small dinosaurs, and fake flowers. (Could also use fake insects or small zoo animals.) 

Construction Site: Floral rocks and construction vehicles. (Actually the same box as the dinosaurs, I just swapped in vehicles instead.)

Magnet Box: Magnet wand with magnet balls, cut pipe cleaners, paperclips, and random magnetic and non-magnetic materials. (Big Brother's favorite these days.) 

Sticker and Punches: Small punches, glue stick, scrap card stock and project papers, and stickers. (Big Brother loves to create bookmarks for the adults.)

Flower Fairy Garden: Aquarium rocks, small terra cotta pots, small buckets, foam stickers, and fake flowers. Fairies created from clothespins, felt, ribbon, and fake flowers.


Sunday, June 9, 2013

Spring Orzo Salad

With the coming of barbeque season comes the need for pasta salad. I love creating different types of salads, especially when they can go together quickly and simply. Lately I've been experimenting with creating an orzo salad we all like. This is the family-friendly recipe I've come up with for the spring events we've been going to. Older kids could be easily involved in the cooking by cutting the tomatoes and cucumbers and helping to stir. In our house we enjoy the blend of simple, sweet vegetables with a slightly tart dressing and salty feta surrounded by the great texture of orzo.

Spring Orzo Salad
This recipe makes a large bowl, great for a potluck and serves at least 8 as a single side. For smaller dinners cut the quantities in half.


Ingredients
1 lb. orzo (one 16 oz. box = a pound)
1/4 fresh lemon juice
1/4 white wine or rice vinegar
1/4 tsp. coarse sea salt
1/4 tsp freshly ground black pepper
1/2 cup olive oil
1 pint grape tomatoes
1/2 english cucumber
6 oz. crumbled feta cheese*
1/4 chopped fresh parsley
1/4 cup chopped fresh scallions

(Note: I have also tried this salad with an herbed, crumbled feta. This added some extra flavor and was delicious.) 


Directions: 
1. Bring a large pot of salted water to a boil and cook pasta according to box directions. (8 to 10 minutes.)
2. While pasta cooks slice tomatoes in half and cut the cucumbers into quarters. Thinly slice the scallions and finely chop the parsley.
3. In a large mixing cup combine the lemon juice, vinegar, salt, pepper, and olive oil and mix with a small whisk to create a dressing.
4. When the orzo is cooked, drain in a colander and rinse under cold, running water. Let the colander sit in the sink for a few minutes until more of the excess water drains out.
5. Combine the cooled orzo, vegetables, herbs, dressing, and feta cheese in a large bowl. Gently stir until mixed.
6. I like to sprinkle a small amount of fresh ground pepper and salt on top.
7. Chill in the fridge for at least a half hour. Related Posts Plugin for WordPress, Blogger...
This post may also have been shared at some of these terrific link parties. 

Friday, June 7, 2013

Bubble Wrap Prints

Big Brother continued to have spells of being pretty sick this week, so most of our time was not spent on projects. But one sunny morning we did take advantage of a moment he was feeling better in order to try out a new painting technique.

We've definitely loved exploring painting lately, and this new technique proved to yet again be a great combination of process and product. I'd heard of bubble wrap painting before but never tried it either by myself or with kids.

To create a printing mat I took a piece of bubble wrap, a piece of cardboard, and painter's tape. 

I cut a piece of bubble wrap to the size of the cardboard and taped it on to the cardboard at the edges with the painter's tape.

After the mat was prepped Big Brother and I set up our washable project paints. 

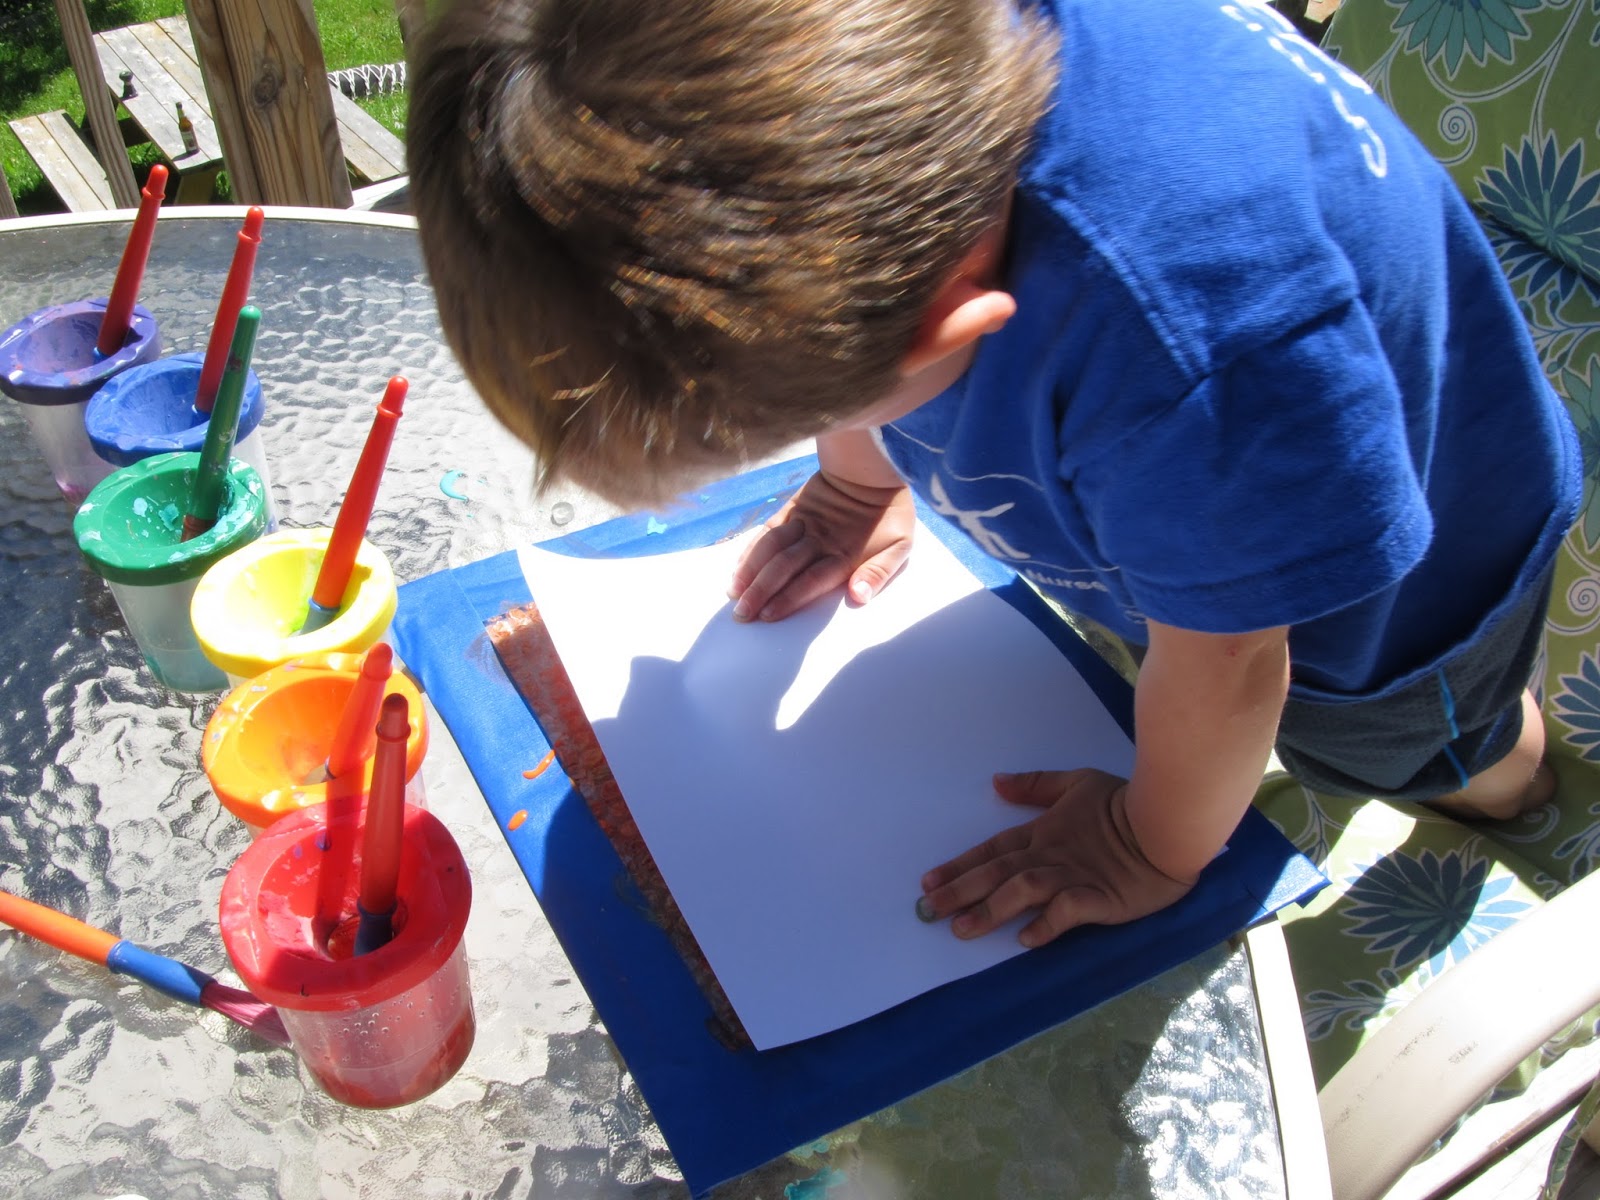
Big Brother began by painting the bubble wrap with the different colors. He mixed some of the colors as he painted. 

He tried to cover all the bubbles so the mat would be ready to be printed. 

We used white card stock again as we need to make some more thank you notes and it works best for the cards. Big Brother laid the paper down and pressed it onto the painted bubble wrap. 

When we pulled off the paper we were left with an interesting and colorful dot design. We were able to print a second piece of paper from the first round of painting. 

I was so drawn to the dots I had to try too and created a rainbow pattern. In the end I liked Big Brother's more random designs instead. 

In between prints we sprayed the mat with water and wiped it off with a paper towel. This way we didn't get just muddy, brown prints as the project continued. 

In the end we had quite an array of prints and we both had yet another new favorite way to paint.

Wednesday, June 5, 2013

Counting Carton

We've been a little mellow here this week as Big Brother has been under the weather. The week has consisted of watching some favorite Netflix shows, reading lots of picture books, doing puzzles, and playing with busy boxes and other quiet toys. Sometimes my biggest struggle when Big Brother is sick is keeping him mellow as he starts to feel better, he often wants to get up and run around before he's ready.

The other day I knew I would need something new, and calm, to keep him entertained. He's been really interested in counting and numbers lately so I decided to create a counting activity. I used an old egg carton, some small red stickers, card stock, and dried beans to create a "counting carton."

Monday, June 3, 2013

Peppermint Foot Soak

Over Memorial Day weekend two of my incredibly talented friends decided to utilize their fitness skills and run in a local marathon. One friend, after a long and dedicated training period, ran her first full marathon. She ran the course in under 5 hours! Another friend completed her fifth half-marathon, which means that she's run 65.5 miles in just marathon running! I'm incredibly impressed with both friends as I never see myself running more than my small, easy to prepare for, 5k runs.

In honor of their running, I wanted to create something they could pamper themselves with. I love the feel of peppermint lotion on tired feet and decided to experiment with a peppermint foot soak.


The Ingredients: 
8 cups epsom salts
1 and 1/2 cups baking soda
1/2 cup loose peppermint tea
8-10 drops of peppermint oil
(The peppermint oil and loose tea can be found at a local health food or bulk store.) 

For Gift Giving:
Glass containers
Ribbon
Labels (optional)


Directions:
1. Mix the epsom salts, baking soda, and loose peppermint tea into a large bowl. Stir with a wooden spoon.


2. Add in 8 to 10 drops of peppermint oil. (Please note, this is peppermint oil not peppermint extract.) The oil is strong so add the drops slowly until it reaches a scent level you're comfortable with. I used a small dropper we had on hand as my oil did not come with a dropper. Stir with a wooden spoon. If clumps form mush with the spoon or your hands.

3. If you're giving the soak as a gift it's nice to package it into glass containers for easy storage. It also looks pretty. I found these containers at a local hardware store. Mason jars would also work nicely. I had enough to fill the three containers, another glass container, and saved some in a ziplock bag to try on my own feet. 

4. I used our word processing program to create a cute gift label. I made this one fit a running theme. But this soak could work for a variety of people, so the label could reflect the group. For those of you still looking for an end of year teacher gift this would also be much appreciated, teachers spend a lot of time on their feet. If you're looking for clip art, there are lots of options on the internet. I always add "free" to my image search as then I find royalty free pieces. I printed these labels onto white card stock.

5. Hole punch the label and use ribbon to tie the card onto the container. A beautiful (and easy) gift for some tired feet!