UA-52744532-1
Showing posts with label baby play. Show all posts

Thursday, May 1, 2014

Big Bottle Ball Drop

So as I put this post together I had a little bit of Mama shock when I realized that I can no longer classify activities for Little Brother as "baby play," he has officially entered the realm of toddler hood. Somehow my little guy is no longer so little.

Little Brother continues to be a pretty on the move guy, so I'm always looking for ways to engage his energy. We spontaneously tried this activity one day, and it was a hit.


Last year we wound up with this big bottle from a job my husband was working on; we saved it because we figured it would be good for possible power outages. Little Brother had so much fun with some of the pom pom drop activities we did last month we were looking for other similar activities. We pulled the big bottle out one day with a handful of ping pong balls and gave it a try. 

Thursday, March 6, 2014

Pom Pom Fun for Older Babies

Little Brother has definitely entered a phase where he needs some more purposeful play, otherwise I find myself trailing around behind a little cyclone of curious chaos.


A few weeks ago on a whim I pulled out a bunch of larger pom poms and created a pom pom can drop for him. This has lead to creating some other invitations to play with pom poms in all sorts of different ways. 

Tuesday, January 14, 2014

Ribbon Rings

Little Brother is an early walker; he's been walking since just before Thanksgiving which means that by this point in time he is really cruising. These days we're often looking for ways to entertain Little Brother as he only wants to be moving and can often find himself getting into things that we don't want him discovering.

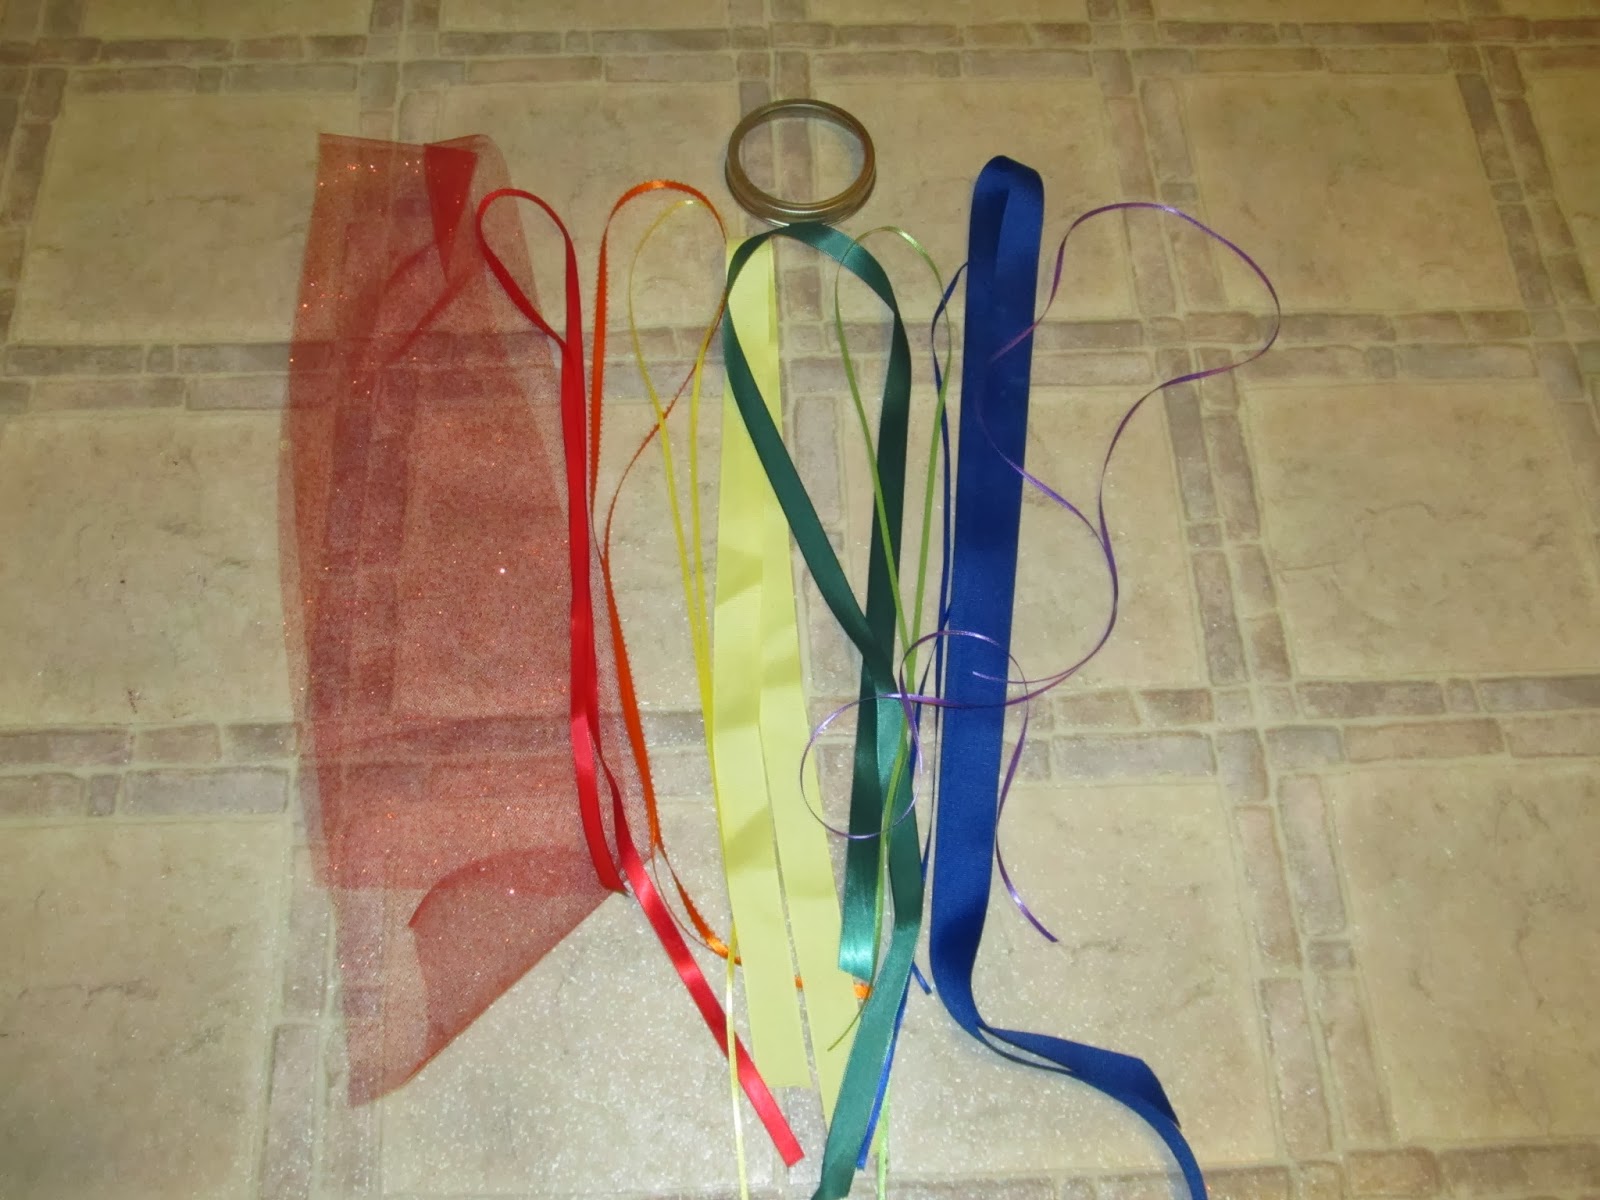
I noticed the other day he liked dragging blankets behind himself and thought he might find something with ribbons fun to pull. Today as I watched him play with some mason jar lid bands, I realized they were the perfect thing to tie ribbons to.

Materials include four to a dozen pieces of ribbon, at least a 18 inches long each, and mason jar bands. (I used wide mouth bands.) 
At first I just used some ribbon scraps. I folded each piece in half and looped it through itself around the ring. After I completed the loop, I again tied the ribbon on the outside of the ring. 


After I made a few rings with scraps, I couldn't resist making a "rainbow ring" with new pieces of ribbon. In the end we had three rings.


Little Brother did enjoy walking around the with the rings, dragging them, and even trying to put it on his head like a hat. 


Big Brother also couldn't resist the ribbon rings, which is why we made more than one. He decided to start a dance party with the rings. 

By the end of the evening, they were hanging on our bedroom door knobs awaiting some more fun tomorrow.


On a side note, you've probably noticed that for the past month Little Brother has a large band-aid on his forehead in most of our posts. Unfortunately, as a casualty of being an early walker, he took a spill into a hard object and needed to get stitches, twice. Although the stitches are out, the cut is still healing and the tumbles still happening, so we've decided it's just safer to keep it covered. We're looking forward to some pictures without the bandages soon. 
Related Posts Plugin for WordPress, Blogger...
This post may also have been shared at some of these terrific link parties. 

Monday, January 6, 2014

Used Wrapping Paper Sticky Collage

So after two great weeks of vacation we were ready to head back into routine today, except we wound up with a rainy "snow day." Most of the day we were happily entertained with books, board and card games, a special lunch, and an Eric Carle movie on Netflix. That was until late afternoon when we were still stuck inside and needed something new to entertain us.


Over the holidays I had saved some used wrapping paper for future projects.  I'd seen sticky paper collages online before and decided we'd combine the two.

The materials are simple: a large sheet of contact paper (we used a sheet of solid white contact paper as it was what we had,) and used wrapping materials. I cut up small squares of paper and strips of used ribbon. I also put out different scissors and shape punches. Big Brother was interested before I could even take a material picture.


Big Brother helped me peel apart the contact paper and we used tape to attach it to the wall sticky side out. Now the fun began. Big Brother cut up pieces of paper and strips of ribbon and stuck them onto the wall. Little Brother got interested too. 


In fact, Little Brother thought it was great fun!


In the end, Little Brother thought it was more fun to remove things from the collage so we created him his own collage with removable pieces so he could leave Big Brother's work alone. 


Both kiddos were entertained by the project, although Big Brother obviously stuck with it longer. He even came back to it a couple of times, so we're leaving the materials out over night for more play tomorrow. 


Related Posts Plugin for WordPress, Blogger...
This post may also have been shared at some of these terrific link parties. 

Saturday, July 6, 2013

Sensory Tummy Time Mat (adult supervision required)

Most of our projects and crafts are more geared towards Big Brother, primarily because he's old enough to participate in a variety of things. But for a while now I've had an idea of something I wanted to make for Little Brother and was excited to finally create it today. I saw something like this on a great blog, Play at Home Mom, almost a year ago but was inspired to create it when I saw how much Little Brother loved studying a hand me down toy with water and fish inside. I also loved all the cool sensory bins I was seeing on Pinterest which used water beads and decided to add in that element.

SAFETY NOTE: Before I go on, as much as I was really excited about how this turned out, I need to add the disclaimer that if you plan to recreate this project please be aware that this activity mat needs full time supervision for your baby. If you're looking to create something that your baby can play with a little "independently" this isn't it. The materials involve a large plastic bag and water, which although they are sealed could still be unsafe for a young child. Little Brother was really excited to explore it with his mouth, and watching him explore it with his face down made me realize it needed 100% supervision. I also encourage you to make this mat when your child has developed enough upper body strength to consistently hold up his/her head independently. 

That said, I love how this worked and how much Little Brother enjoyed it. It was a great sensory experience for him and he was all smiles with it this afternoon.

To begin with I purchased a box of 10 gallon ziplock bags a few weeks ago. I also used some foam shapes and colorful duck tape we had on hand. I added in a package of water gems. Water gems are water absorbent polymer beads which absorb and store water. They can be found in the floral department of your craft store. Although they are too small for infants and toddlers to play with, in this case they were contained inside the bag. I chose to use dry water gems.

I taped up the side edges of the bag for extra reinforcement and then put both the foam shapes and the dry water gems inside. Afterwards I taped part of the top but left a small opening for adding water. 

I filled the bag with water by slipping it over the kitchen faucet. I didn't measure, just filled until it looked to be a good amount while taking into account the water gems were supposed to grow. I carefully squeezed as much air out as I could so that the bag was as flat as I could get it. In the end I needed to tape the bottom too, as it had an expandable bottom and it was holding too much air. I then taped across the top and the bag seal. 

The gem directions said they would take a few hours to grow, but Little Brother was quite interested while watching me create the mat so I decided to let him try it out. 

Tummy time first (which lead to some very interested sucking of the mat) . . .

followed by half-sitting studying . . .  

and ending with some big smiles. 


At first I was pretty disappointed in the gems, and thought if I made a mat again I wouldn't use them. As Big Brother woke up from his rest I put the mat into the bath tub to come back to later. When we did, I had a big surprise. The gems now looked much more like I had expected and very nicely filled out the bag. The squishy mat now felt a lot more interesting. 

Of course now Big Brother had to try it and it captured his attention for quite a bit. He liked trying to move all the beads to one area. 

He also enjoyed "helping" Little Brother explore the mat. 

And after they went to bed? I found myself squishing it around with my toes too! 

Saturday, May 18, 2013

Fabric Fun Box

A sweet little friend of ours turned 1 this week. Last week during a play date I noticed how much she liked taking things in and out of containers. It reminded me of a link I had seen a while back on how to make a baby toy out of a wipe container and fabric scraps. I decided to make one for her birthday. I knew I had a great collection of fabric scraps from a project I'd done as a preschool teacher over 8 years ago. (I rarely throw anything out . . . just ask my husband.)

Materials included fabric scraps, white contact paper, permanent markers, an empty wipe box, regular scissors, and pinking shears. A Huggies Box works well because the opening is soft and easy for little hands to slip into. 

I wanted to personalize it for her so I decided to cover the box with white contact paper. I cut two strips each four inches wide. 

I peeled off the paper and wrapped one strip around the front on the box and the sides. I chose to trim the paper while it was on the box, but it could be traced beforehand. I then cut the other strip in half and covered the back of the box.  

I added some garden designs, and later added her name, with permanent marker. 

Next I cut the scraps with the pinking shears. I cut each piece to be slightly larger than a DVD case. I used the pinking shears with the hope it would decrease fraying. 
There were about 15 rectangles all together. The fabric rectangles folded into the box neatly. 

The box was ready for playing. Now there can be lots of pulling out, putting back in, and lid opening. I can't wait to hear how she enjoys it!